Procedimiento paso a paso para la prueba de integridad del filtro de punto de burbuja
INTRODUCCIÓN
Ensuring the integrity of filter cartridges is a critical step in sterile filtration processes used in industries such as pharmaceuticals, biotechnology, food and beverage, and medical devices. Among various integrity tests, the prueba de integridad del filtro de punto de burbuja is one of the most widely employed methods. It provides a non-destructive, fast, and reliable measure of whether a membrane filter is functioning as intended.
Unlike general descriptions of bubble point principles, this article focuses on practical, step-by-step procedures, along with important considerations and common pitfalls. Following these guidelines helps operators, quality assurance teams, and engineers ensure consistent, accurate, and regulatory-compliant testing.
Preparation Before Testing
1. Review Filter Specifications
Before starting the test, carefully review the manufacturer’s specifications for the filter cartridge. Critical parameters include:
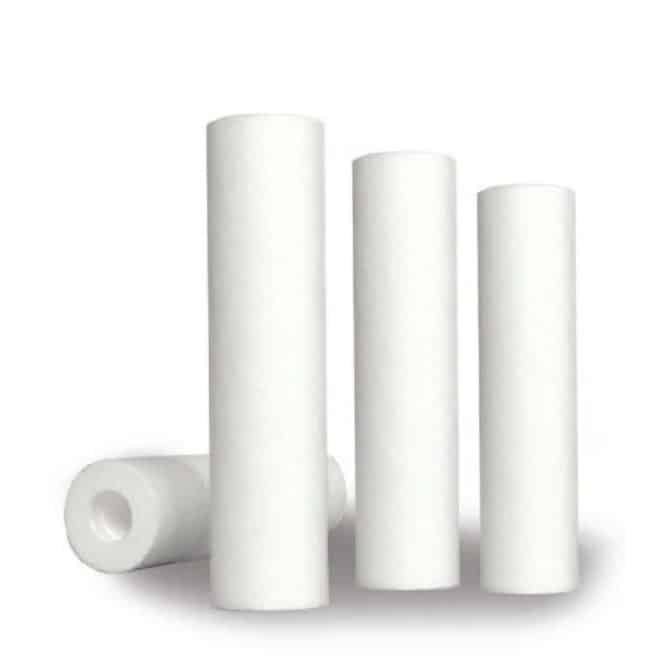
Pore size (e.g., 0.22 µm, 0.45 µm)
Membrane material (PES, PVDF, Nylon, PTFE)
Recommended wetting liquid (water, alcohol-water mixture, or other compatible liquids)
Acceptable bubble point range
Ensuring correct reference values avoids false failure reports and ensures regulatory compliance.
2. Gather Required Equipment
Essential equipment includes:
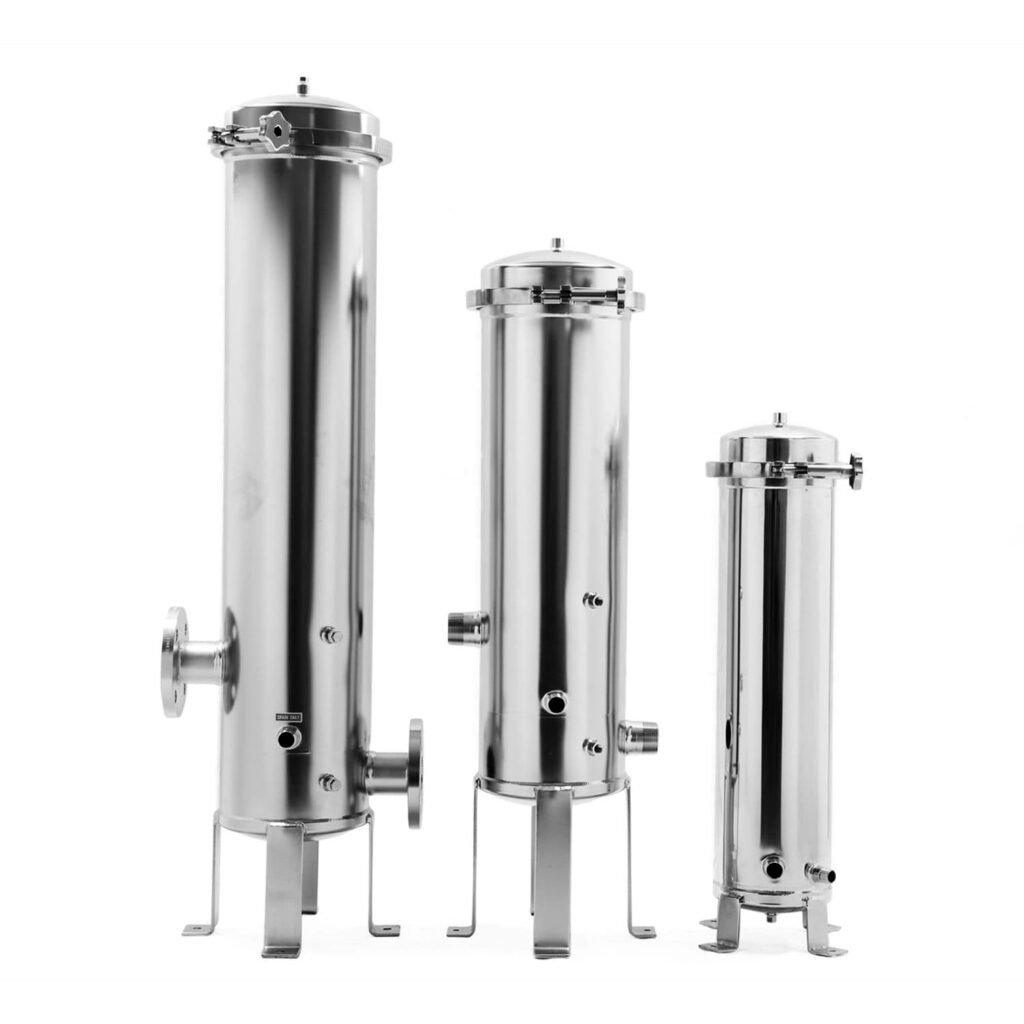
Filter housing or cartridge holder
Pressure source (air or nitrogen) with precise pressure control
Pressure gauge or digital pressure sensor
Bubble detection mechanism (visual observation or automated flow meter)
Wetting liquid (pre-filtered and compatible with the membrane)
Safety equipment (gloves, goggles)
Step 1: Filter Installation
Proper installation of the filter cartridge is crucial to avoid leaks or pressure loss. Steps include:
Ensure the filter housing is clean and free from debris.
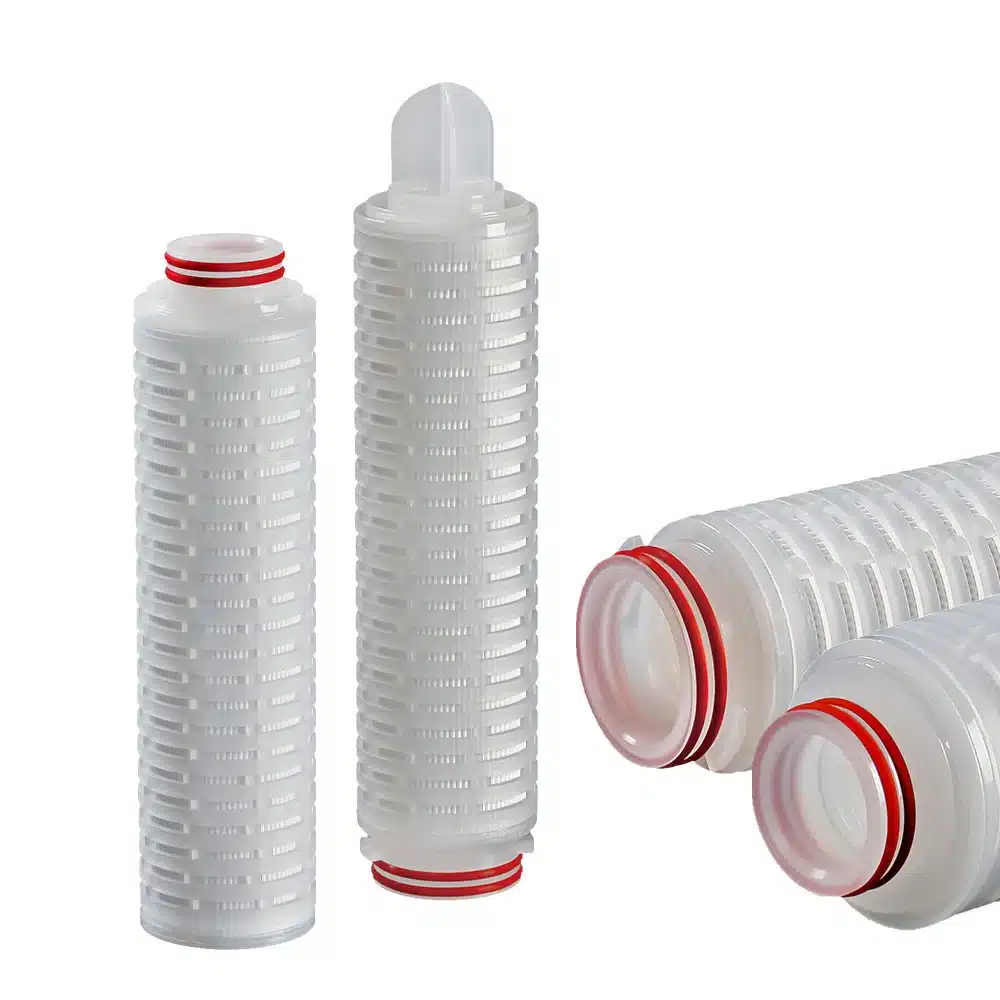
Inspect O-rings and gaskets for wear or damage. Replace if necessary.
Insert the filter cartridge securely, making sure it is properly seated.
Tighten housing closures evenly to avoid deformation or bypass leakage.
Consejo: Never use excessive force, as this can damage the filter end caps or membrane.
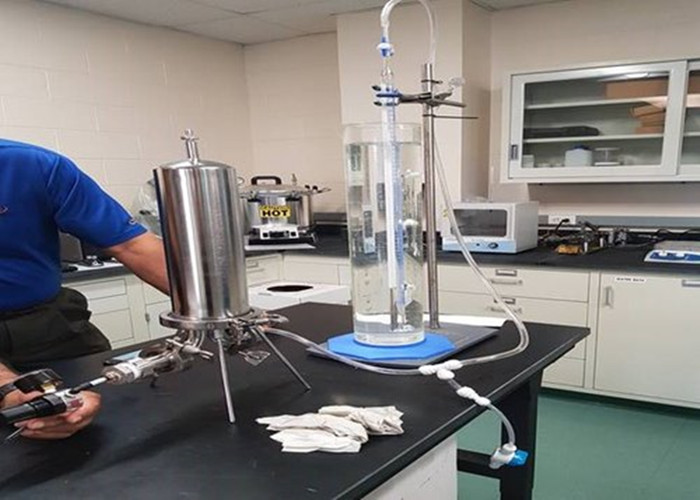
Step 2: Wetting the Filter
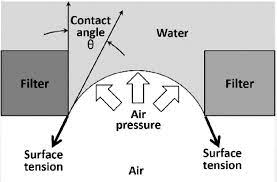
Importance of Proper Wetting
Wetting ensures that all membrane pores are filled with liquid, allowing the bubble point test to accurately detect the largest pore size.
Procedure:
Slowly introduce the wetting liquid into the filter, ensuring complete saturation.
Allow air bubbles trapped inside the cartridge to escape naturally.
Avoid overfilling, which may lead to liquid spillage during pressurization.
Common Pitfalls:
Using the wrong liquid can lead to low bubble point readings.
Incomplete wetting results in false test failures.
For hydrophobic membranes (e.g., PTFE), pre-wetting with an alcohol-water mixture is often required.
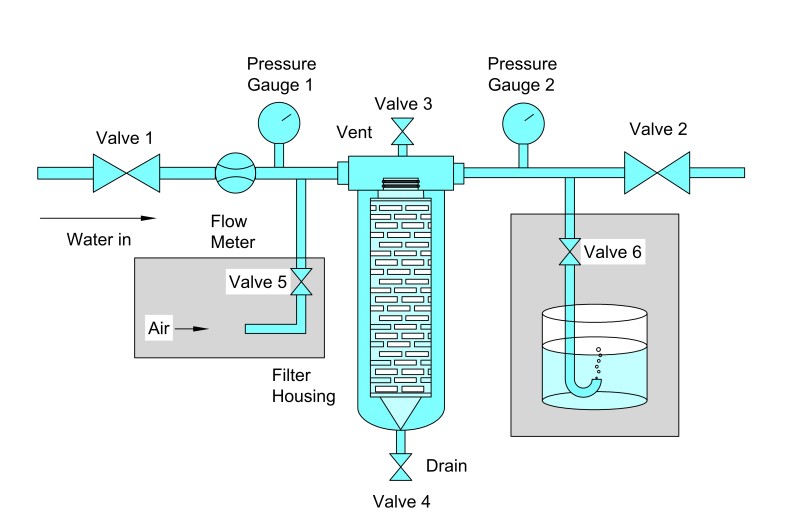
Step 3: Connecting the Pressure Source
Connect the upstream side of the filter housing to the pressure source.
Ensure all valves downstream are closed, except for the detection port.
Verify pressure gauge calibration to ensure accurate readings.
Slowly pressurize the system to remove any air pockets in the lines.
Key Points:
Avoid sudden pressure spikes that can damage the filter.
Use a regulated pressure source capable of fine adjustments.
Step 4: Incremental Pressurization
The next step involves gradually increasing the applied gas pressure to reach the punto de burbuja.
Start at a low pressure (well below the expected bubble point).
Increase pressure in small increments (e.g., 0.1–0.2 bar).
After each increment, observe for bubble formation downstream.
Continue until a continuous stream of bubbles emerges.
Observation Tips:
A few sporadic bubbles are normal; the bubble point is reached when bubbles flow steadily.
Automated testers often provide a digital signal when the bubble point is reached.
Step 5: Measuring the Bubble Point Pressure
Record the pressure at which continuous bubbles appear—this is the bubble point.
Compare the measured value with the manufacturer’s specified range.
If the value falls within the acceptable range, the filter passes the test; if not, further inspection or replacement is required.
Note:
Temperature and liquid surface tension affect bubble point. Always perform the test at controlled conditions.
Repeating the test for confirmation can improve reliability.
Step 6: Post-Test Procedures
After obtaining the bubble point:
Slowly release the pressure to avoid sudden liquid discharge.
Remove the filter and inspect for any physical damage.
If the test is non-destructive, the filter can proceed to production.
Record all results in the QA documentation systemincluyendo:
Operator name
Date and time
Filter lot number
Measured bubble point
Test conditions
Factors Affecting Accuracy
Several variables influence the accuracy and repeatability of the bubble point test:
Liquid choice: Use only compatible and pre-filtered liquids.
Filter type: Different membranes (hydrophilic vs hydrophobic) respond differently.
Temperature: Maintain consistent ambient and liquid temperature.
Pressure ramp rate: Too fast can cause overshooting; too slow increases test time unnecessarily.
Operator experience: Training is crucial for manual observation.
Equipment calibration: Pressure gauges and automated testers must be regularly verified.
Common Issues and Troubleshooting
Even when following standard procedures, some challenges may arise during the bubble point filter integrity test. Understanding common issues and their solutions helps maintain accuracy and reliability:
1. Incomplete Wetting
Problem: Some membrane pores remain dry.
Effect: Bubble point appears lower than expected, possibly indicating a false failure.
Solución: Ensure slow introduction of the wetting liquid and allow trapped air to escape. For hydrophobic membranes, use alcohol-water pre-wetting.
2. Air Leakage
Problem: Leaks in connections, O-rings, or gaskets.
Effect: Measured bubble point is inaccurate, or bubbles appear prematurely.
Solución: Inspect all seals, replace worn O-rings, and verify tight connections.
3. Pressure Instability
Problem: Fluctuating pressure from the gas supply.
Effect: Difficult to determine the exact bubble point.
Solución: Use a regulated pressure source and monitor with a calibrated gauge. Automated systems reduce human error.
4. Temperature Variations
Problem: Ambient or liquid temperature differs from recommended conditions.
Effect: Surface tension changes, affecting bubble point pressure.
Solución: Maintain testing at a controlled temperature, typically 20–25°C.
5. Human Observation Errors
Problem: Visual detection may be subjective.
Effect: Inconsistent results between operators.
Solución: Use automated bubble point testers when possible, or train personnel thoroughly.
Best Practices for Accurate Testing
To ensure reliable results and regulatory compliance, follow these best practices:
Standardize Test Conditions
Maintain consistent temperature, liquid, and pressure ramp rate for each test.Pre-Test Verification
Verify equipment calibration and check filter integrity visually before testing.Use Proper Wetting Liquids
Hydrophilic membranes: Water is sufficient.
Hydrophobic membranes: Use alcohol-water mixtures or recommended liquids.
Automated Testing
Automated bubble point testers improve repeatability, provide digital logs, and comply with 21 CFR Part 11 for electronic records.Perform Pre- and Post-Use Testing
Ensures filters are fit for use and still intact after production.Document All Steps
Maintain QA records with detailed notes on:Test operator
Date and time
Filter lot number
Test liquid and temperature
Measured bubble point
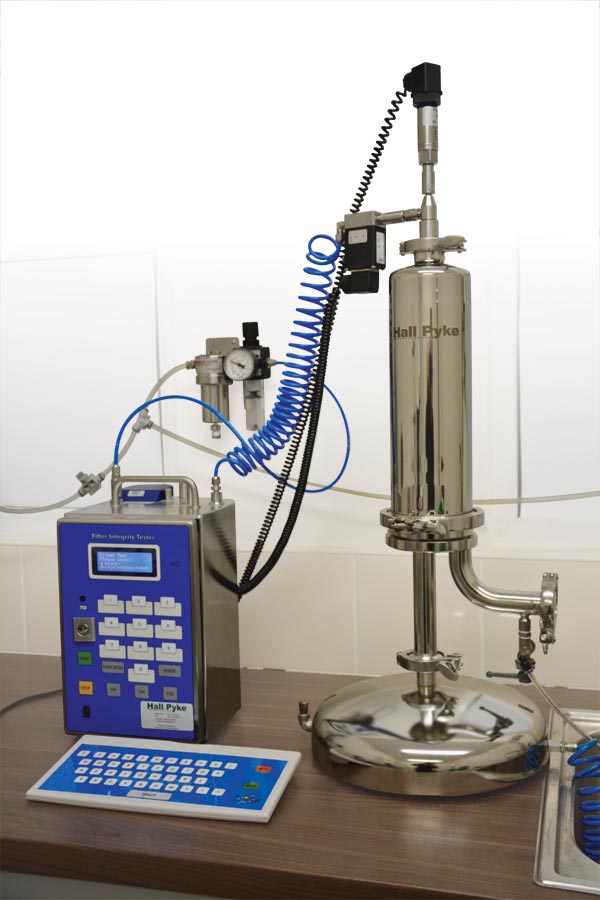
Automation and Advanced Equipment
Modern bubble point testing often uses automated integrity testers, which provide several advantages:
Digital Pressure Control: Precise ramping of pressure to avoid overshoot.
Continuous Monitoring: Sensors detect bubble formation automatically.
Data Logging: Automatic recording of test results for regulatory compliance.
Multiple Filters: Some systems test multiple cartridges simultaneously, saving time.
Automation reduces human error, increases throughput, and provides traceable, auditable records, which are essential in GMP and FDA-regulated environments.
Case Study: Biopharmaceutical Filtration
A biotech company producing monoclonal antibodies employs sterile filtration using 0.22 µm PES filters. The procedure includes:
Filter Installation: Cartridge securely placed in housing, O-rings checked.
Wetting: Filters wetted with water; trapped air bubbles released.
Pressurization: Automated tester gradually increases nitrogen pressure.
Bubble Point Measurement: Continuous bubble stream detected at 3.7 bar, within manufacturer specification of 3.5–3.9 bar.
Documentation: Test results stored in LIMS with operator signature.
Outcome: Filters passed integrity verification, ensuring sterile filtration compliance before production.
Key Notes and Tips
Always Follow Manufacturer Guidelines
Each membrane type and filter cartridge has unique specifications.Consistency is Critical
Maintain the same wetting method, pressure increments, and detection procedure.Avoid Filter Damage
Do not exceed recommended pressure limits; sudden pressure spikes can rupture membranes.Training Matters
Personnel should be trained in both manual and automated bubble point testing techniques.QA Documentation
Proper documentation is essential for regulatory inspections and audits.
Future Trends in Bubble Point Testing
As filtration technology evolves, bubble point testing continues to advance:
Integration with MES and LIMS: Automatic transfer of results to digital management systems.
High-Throughput Testing: Simultaneous testing of multiple cartridges in industrial setups.
Enhanced Sensitivity: Detecting micro-defects in advanced membranes.
Single-Use Bioprocessing: Adapting bubble point tests to disposable filter systems.
Sostenibilidad: Developing environmentally friendly wetting agents and reducing water usage.
Conclusión
En Procedimiento paso a paso para la prueba de integridad del filtro de punto de burbuja is an essential process for ensuring filter performance and compliance in sterile filtration applications. By following standardized steps—preparation, installation, wetting, pressurization, bubble point measurement, and documentation—operators can confidently verify the integrity of filters.
Key takeaways include:
Adecuado filter wetting and installation are critical.
Incremental pressurization and accurate detection ensure reliable results.
Automation and proper documentation enhance accuracy and regulatory compliance.
Troubleshooting and adherence to best practices prevent false failures.
By implementing a rigorous, stepwise procedure, industries can maintain product safety, regulatory compliance, and operational efficiency, while reducing the risk of contamination and production delays.
Referencias
- The Importance of Bubble Point Test for Filter Integrity – Econe Filtration
Por qué los cartuchos filtrantes requieren una prueba de integridad del punto de burbuja y su importancia
Bubble Point Test: Purpose & Procedure – GMP Annex 1 Guidance
Provides a detailed overview of bubble point test applications, procedures, and regulatory significance under GMP Annex 1.FDA Guidance for Industry – Sterile Drug Products Produced by Aseptic Processing
U.S. FDA guidance emphasizing the importance of filter integrity testing before and after use in aseptic manufacturing.Standard Operating Procedure (SOP) for Bubble Point Test – PharmaTimes
A practical SOP document that outlines step-by-step bubble point test procedures in pharmaceutical operations.Bubble Point Integrity Testing in Beverage Filtration – Scott Labs
Explains bubble point testing techniques used in the food and beverage industry to verify filter integrity.NIH Frederick National Laboratory – Bubble Point Test for 0.2 Micron Filters (PDF)
Official SOP document describing the bubble point test for sterile 0.2 µm filters in laboratory applications.Factors Affecting Bubble Point Accuracy – Cytiva White Paper
Technical analysis of variables influencing bubble point results, including pressure ramp rate, wetting, and temperature.Merck Millipore – Integrity Testing Methods: Bubble Point Procedure
Manufacturer guidelines describing bubble point testing principles and procedures for membrane filters.Bubble-Point Test – Wikipedia (German)
Encyclopedia article describing the bubble point test principle and its application in membrane pore size measurement.
Ver todos nuestros Cartuchos filtrantes